- startseite /
- guides /
- install mods on a arma reforger server en
Guides

Install Mods on a Arma Reforger Server

Rent a prepaid Arma Reforger Gameserver now at nitrado.net
Here we show you how to install mods on your dedicated Arma Reforger server. We will use the official mod “Capture and Hold” as an example. These instructions can also be applied to any other mod.
Preparation
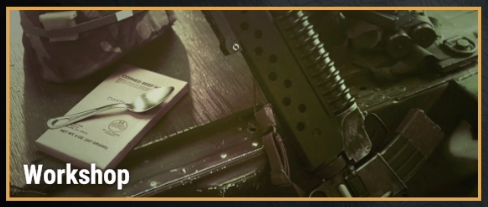
- Start your game and click on “Workshop” in your game client.
- Search for the mods you want, using the search filter (top right) or scroll through the pages.
- Make a note of the name `Capture & Hold` and the version `1.0.0`. We will need it later.

- Click on the desired mod and on the following page, click “Download” to confirm the download.

- Go to the folder “My Games/ArmaReforger/addons” in your PC’s Documents folder. Here, you will find all your Workshop mods.

- If there are several mods and you’re unsure, open the folder and compare the images with those from the Workshop.

- Once you’ve found the correct mod, write down the folder name. In our case, it’s `591AF5BDA9F7CE8B`—this is the mod ID.
Now we should have the following information:
{ "modId": "591AF5BDA9F7CE8B", "name": "Capture & Hold", "version": "1.0.0" }Adding the mods
- Open your game server’s web interface and go to “Settings > Configuration files”.
- In the window that opens, edit the “config.json” and look for the following section:
, "mods": [] }- Enter the data for your mod in the square brackets:
{ "modId": "591AF5BDA9F7CE8B", "name": "Capture & Hold", "version": "1.0.0" }| Example | Description | Code |
|---|---|---|
| Example for only 1 mod | This is how it should look for our example |
|
| Example for several mods (with at least 2 mods) | Separate them with a comma (,) |
|
Adding the mission
- Open your game server’s web interface and go to “Settings > General”, and enter the desired scenario.
- Alternatively, go to “Settings > Configuration Files” and edit the “scenarioId” in the “config.json”.
A list of all related scenarios can be found in this wiki article: Missions in Arma Reforger.
- Enter the data from your mod in the square brackets.
Your configuration should now look something like this:
{
    "dedicatedServerId": "nitrado_XXXXX",
    "region": "EU-FFM",
    "gameHostBindAddress": "XXX.XXX.XXX.XXX",
    "gameHostBindPort": XXXXXX,
    "gameHostRegisterBindAddress": "XXX.XXX.XXX.XXX",
    "gameHostRegisterPort": XXXXX,
    "game": {
        "name": "Capture and Hold - Camp Blake - by Nitrado.net",
        "password": "",
        "scenarioId": "{6EA2E454519E5869}Missions/CAH_Military_Base.conf",
        "playerCountLimit": 10,
        "visible": true,
        "gameMode": "",
        "gameProperties": {
            "serverMaxViewDistance": "1600",
            "battlEye": true
        },
        "mods": [
            { "modId": "591AF5BDA9F7CE8B", "name": "Capture & Hold", "version": "1.0.0" }
        ]
    }
}
Checking your configuration
- You can copy your complete configuration and paste it on this page: https://jsonlint.com/
- If everything is correct, you should see a confirmation message.
- Now restart your server and enjoy the Capture and Hold mode on it.
Once your mods are installed and the mission is added, you’re ready to enjoy a fully customized Arma Reforger experience with your friends. Happy gaming!
Get Arma Reforger Server Hosting now!
FAQ – Installing Mods on Your Arma Reforger Server
How do I install mods on my Arma Reforger server using Nitrado?
- Start Arma Reforger and open the Workshop tab.
- Search for and download your desired mod.
- Go to your PC folder:
Documents/My Games/ArmaReforger/addons. - Find the folder name (e.g.,
591AF5BDA9F7CE8B)—this is the mod ID. - In the Nitrado web interface, go to Settings > Configuration Files and edit
config.json. - Add the mod under the “mods” section like so:
"mods": [ { "modId": "591AF5BDA9F7CE8B", "name": "Capture & Hold", "version": "1.0.0" }] - Save and restart your server.
Where do I find the mod ID for a mod I downloaded?
Open Documents/My Games/ArmaReforger/addons on your PC. Each folder corresponds to a downloaded mod. You can identify the right one by comparing the images with the mod’s Workshop page. The folder name (e.g., 591AF5BDA9F7CE8B) is the mod ID you’ll need.
How do I add a mission like Capture and Hold to my server?
- Go to your server settings > General or edit
scenarioIddirectly inconfig.json. - Use the correct mission ID. For example, for Capture and Hold – Camp Blake:
"scenarioId": "{6EA2E454519E5869}Missions/CAH_Military_Base.conf" - Save and restart your server.
My mods aren’t working—what could be wrong?
Common causes include:
- Incorrect mod ID or version number
- Syntax errors in
config.json– use JSONLint to validate your configuration. - Mod missing from your local folder or not properly downloaded
- Mod conflicts or outdated versions
Double-check your mod entry in “mods” and ensure it’s inside the “game” section in config.json.
How do I validate my Arma Reforger config.json file?
Copy the entire contents of your config.json and paste it into https://jsonlint.com. If it’s correctly formatted, you’ll get a green confirmation. Otherwise, JSONLint will show you what needs fixing.
Can I install multiple mods?
Yes. In config.json, list them separated by commas:
"mods": [
  {
    "modId": "591AF5BDA9F7CE8B",
    "name": "Capture & Hold",
    "version": "1.0.0"
  },
  {
    "modId": "abcd3995-b1d9-473d-aa11-0836c0a595ad",
    "name": "WeaponSwitching",
    "version": "1.0.1"
  }]
What’s the correct structure for a working config.json?
Your config.json should look like this:
{
  "dedicatedServerId": "nitrado_XXXXX",
  "region": "EU-FFM",
  "gameHostBindAddress": "XXX.XXX.XXX.XXX",
  "gameHostBindPort": 12345,
  "gameHostRegisterBindAddress": "XXX.XXX.XXX.XXX",
  "gameHostRegisterPort": 12345,
  "game": {
    "name": "Capture and Hold - Camp Blake - by Nitrado.net",
    "password": "",
    "scenarioId": "{6EA2E454519E5869}Missions/CAH_Military_Base.conf",
    "playerCountLimit": 10,
    "visible": true,
    "gameMode": "",
    "gameProperties": {
      "serverMaxViewDistance": "1600",
      "battlEye": true
    },
    "mods": [
      {
        "modId": "591AF5BDA9F7CE8B",
        "name": "Capture & Hold",
        "version": "1.0.0"
      }
    ]
  }}
Preparation
Adding the mods
Adding the mission
Checking your configuration
FAQ – Installing Mods on Your Arma Reforger Server
- How do I install mods on my Arma Reforger server using Nitrado?
- Where do I find the mod ID for a mod I downloaded?
- How do I add a mission like Capture and Hold to my server?
- My mods aren’t working—what could be wrong?
- How do I validate my Arma Reforger config.json file?
- Can I install multiple mods?
- What’s the correct structure for a working config.json?