Guides

Dont Starve Together Caves – Server Guide
Your Don’t Starve Together world doesn’t stop at the surface. Enable caves and your server gains an entire underground biome. Depths worm attacks, sudden earthquakes, and terrain you won’t find on the surface all wait below.
Caves don’t turn on with a single setting. You link a second Don’t Starve Together server to your main one as a shard. That second server generates and runs the underground map. In this Nitrado guide, we’ll show you how to set up that link, edit the config files it needs, and confirm the caves are running.
What You Need Before You Start
To add caves, you need two separate Don’t Starve Together game servers. One stays your main playable server. The other becomes a dedicated caves server that generates and hosts the underground map. There’s no built-in way to turn caves on, so linking two servers as a shard is the way to enable them.
The cluster token that links them comes from your Klei account. Sign in with the account that has Don’t Starve Together in its Games list. One token covers both servers, because they’re part of the same cluster, so you only need to generate it once.
Setting up the caves server replaces its existing world. Back up your world first if it already has a save you want to keep.
We recommend stopping both servers before making any configuration changes, including the steps in this guide.
Get Your Cluster Token From Klei
Get a cluster token from your Klei account, then enter it on both servers in your Nitrado Web Interface.
- Log into your Klei account and open Games. Select the Don’t Starve Together card, then click GAME SERVERS.
- On the Servers page, type a name for your cluster into Cluster Name, then click ADD NEW SERVER.
- Copy the cluster token from the server card that appears.
- On both servers, go to Settings > General, find the Account section, and paste the token into Server token.
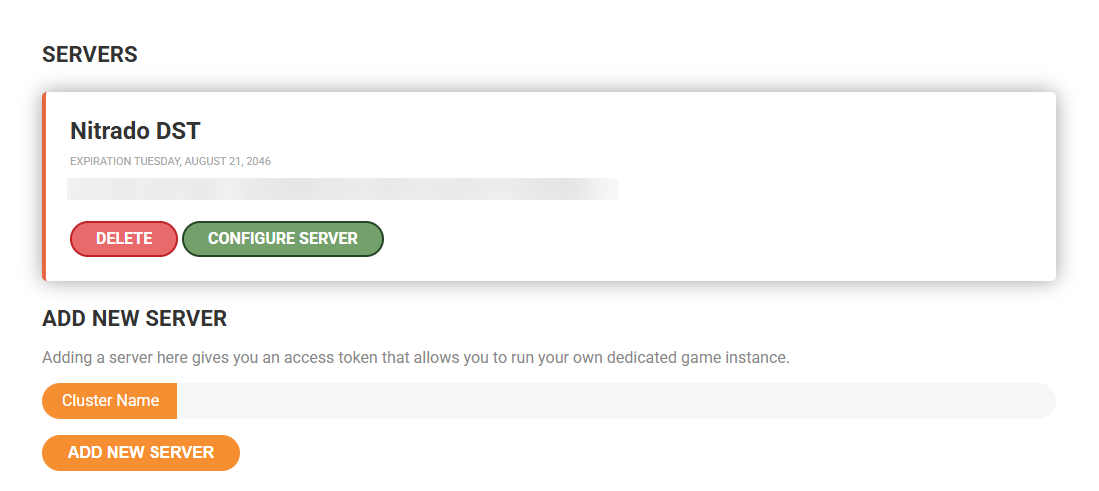
Enter your Steam64ID in Client token on both servers too. If you need help finding it, Nitrado’s guide to create a token for Don’t Starve Together covers the exact steps.
Enter the Shard Settings on Both Servers
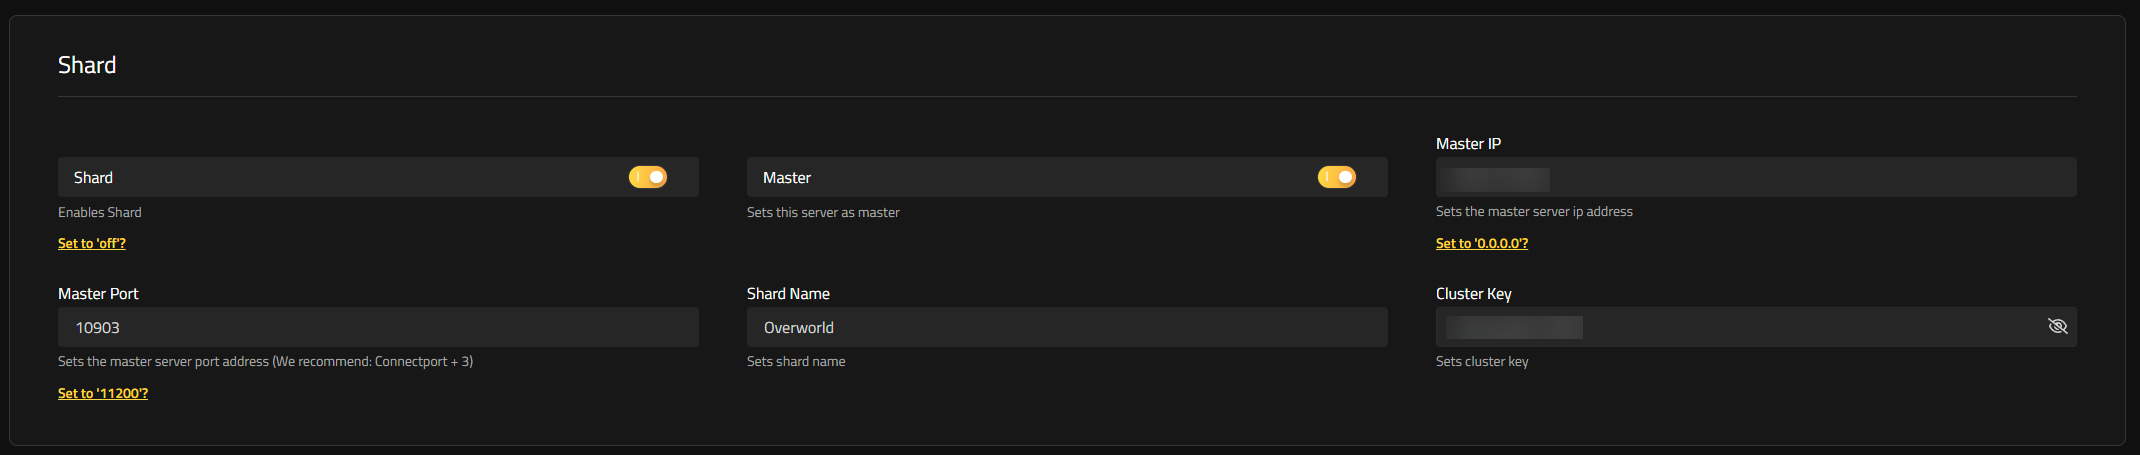
Next, turn on shard mode from the Shard section of Settings > General, on both servers.
- Turn on Shard on both servers.
- Turn on Master on your main server. Turn off Master on your caves server.
- Set Master IP to your main server’s IP address, on both servers. For example, if your main server’s IP is 203.0.113.10, enter 203.0.113.10 on both.
- Set Master Port to your main server’s game port plus 3, on both servers. For example, if your main server’s game port is 7777, enter 7780.
- Give both servers the same Cluster Key. Use a long string of characters, for example dst-caves-cluster-8341.
- Set a Shard Name for each server, such as Overworld for the main server and Caves for the caves server.
- Click Save changes on both servers.
Master IP and Master Port point both servers at the master server. The Cluster Key has to match on both servers for the link to work, and Shard Name is the label each shard uses.
Start Each Server Once
Start each server for the first time. A fresh Don’t Starve Together server generates its cluster files on that first start, so both servers need at least one boot before you can edit them.
Once both servers have started, open Tools > File Browser on either one and check the Cluster_1 folder. You’ll see these items, all created automatically:
- a
Masterfolder, which holds the world’ssaveandbackupfolders - an auto-generated
server.iniinsideMaster cluster.iniandcluster_token.txt- the server log files
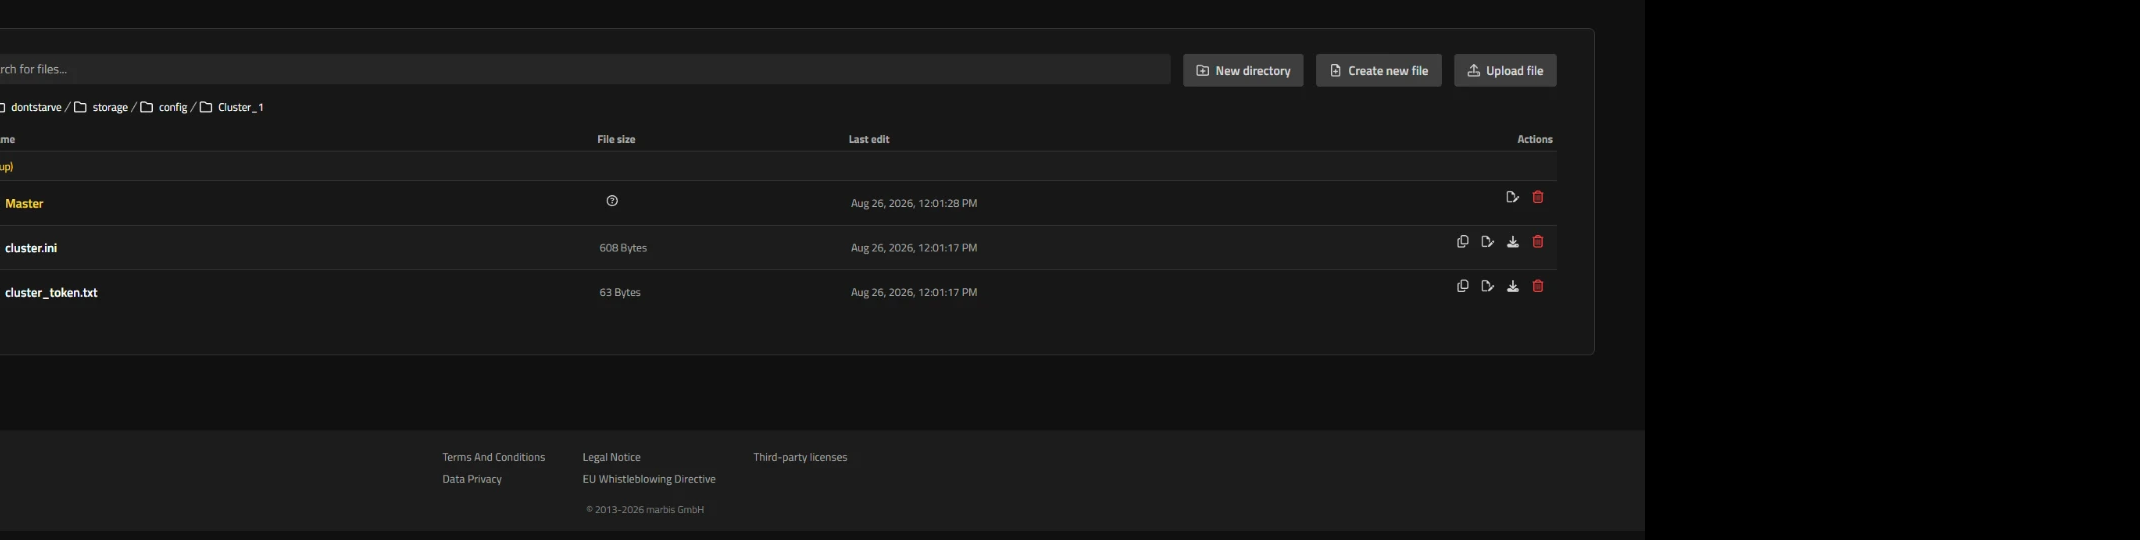
Stop both servers again before you continue. The servers read these files at startup, and the game can overwrite edits you make while a server runs.
Add the Shard Block to server.ini
Your Shard settings already write the correct Master IP, Master Port, and Cluster Key into cluster.ini on both servers, so you don’t need to touch that file. But the Shard settings alone don’t turn on shard mode. Each server also needs a small [SHARD] block added to its server.ini file, or the two servers won’t link.
The auto-generated server.ini on each server currently holds only an [ACCOUNT] section. Adding the [SHARD] block below it is the only edit either file needs. Nitrado passes the server’s ports on the command line, so no separate network or Steam settings belong in this file.
On your main server, go to Settings > Config Files, open server.ini, and add this block below the existing [ACCOUNT] section:
[SHARD]
shard_enabled = true
is_master = true
name = Overworld
id = 1
bind_ip = 0.0.0.0
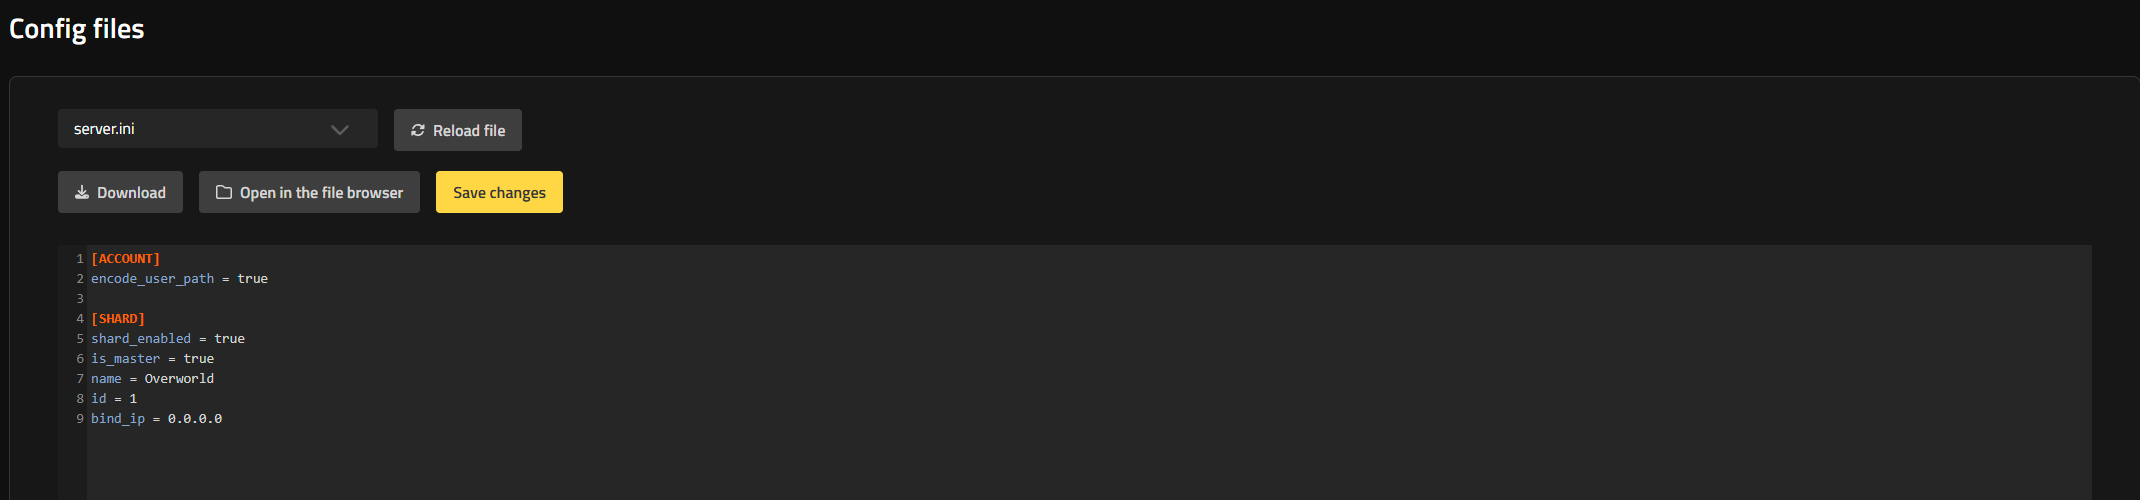
On your caves server, open its server.ini the same way and add this block instead:
[SHARD]
shard_enabled = true
is_master = false
name = Caves
id = 2
Save both files.
Create worldgenoverride.lua on the Caves Server
With your caves server still stopped, open Tools > File Browser on it and go to dontstarve/storage/config/Cluster_1/Master. Click Create new file, name it worldgenoverride.lua, and set its contents to the following:
return {
  override_enabled = true,
  preset = "DST_CAVE",
  overrides = {
    task_set = "cave_default",
    start_location = "caves",
  },
}
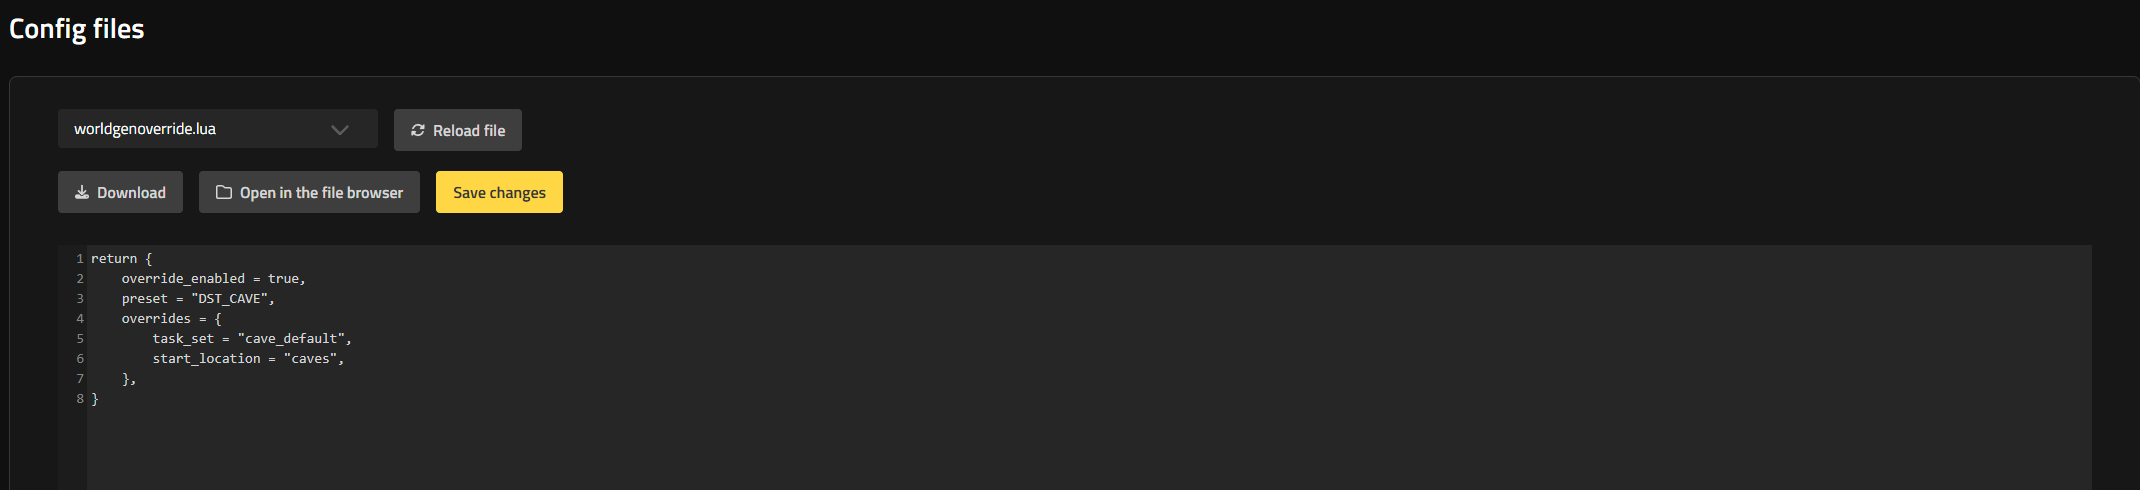
Pin task_set and start_location exactly as shown. If your caves server has already connected to your main server once and this table is left empty, the game rewrites the file. The rewrite fills the overrides with shared world settings, including a surface task set, and cave generation fails. Only edit this file while the caves server is stopped.
Reset the Caves World
Regenerate the caves world so it picks up the settings you pinned in the previous step. Only the caves world regenerates. Your main server’s existing world stays exactly as it is.
- Confirm your caves server is stopped.
- Open Tools > File Browser on the caves server and go to Cluster_1/Master.
- Delete the
savefolder. A prompt asks “Do you want to delete this file or directory?” Click “Yes, delete.” - Check the File Browser again to confirm the
savefolder is gone. - Start the caves server.
Deleting the save folder while the server is running does nothing, because the server rewrites it at shutdown. Stop the server first, delete the folder, confirm it’s gone, then start the server.
A successful reset logs “Done cave map gen!” once world generation finishes. The sinkhole portals then validate as active instead of disabled in the log.
Check That the Caves Are Connected
Open Information > Log Files on your main server and look for two lines once both servers have started:
[Shard] Secondary Caves(2) ready!
World 2(Caves) is now connected
A line reading “[Shard] Connection to master failed. Waiting to reconnect…” right after boot is normal. The caves server reconnects within a few seconds, so give it a moment before you assume something is wrong.
Then confirm it in game. Connect to a Don’t Starve Together server and jump into a sinkhole.
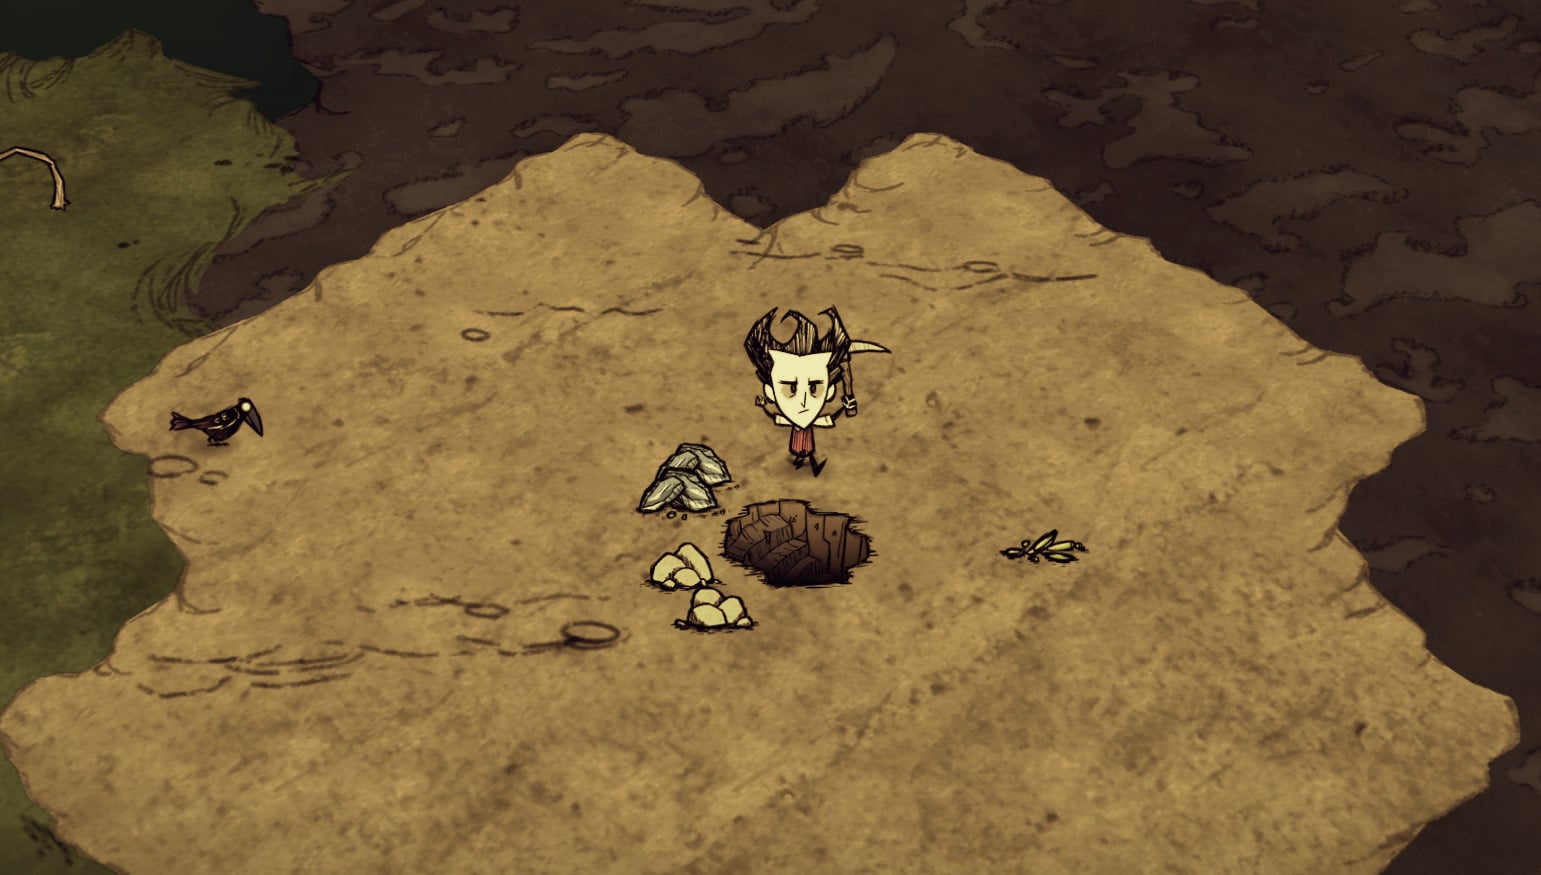
You’ll land in a sunlit entrance area with trees, grass, and birdsong that looks a lot like the surface. That’s expected, not a sign anything went wrong. Underground, look for the day clock sitting inside a ring of rock instead of open sky. That’s your confirmation you’re in the caves.
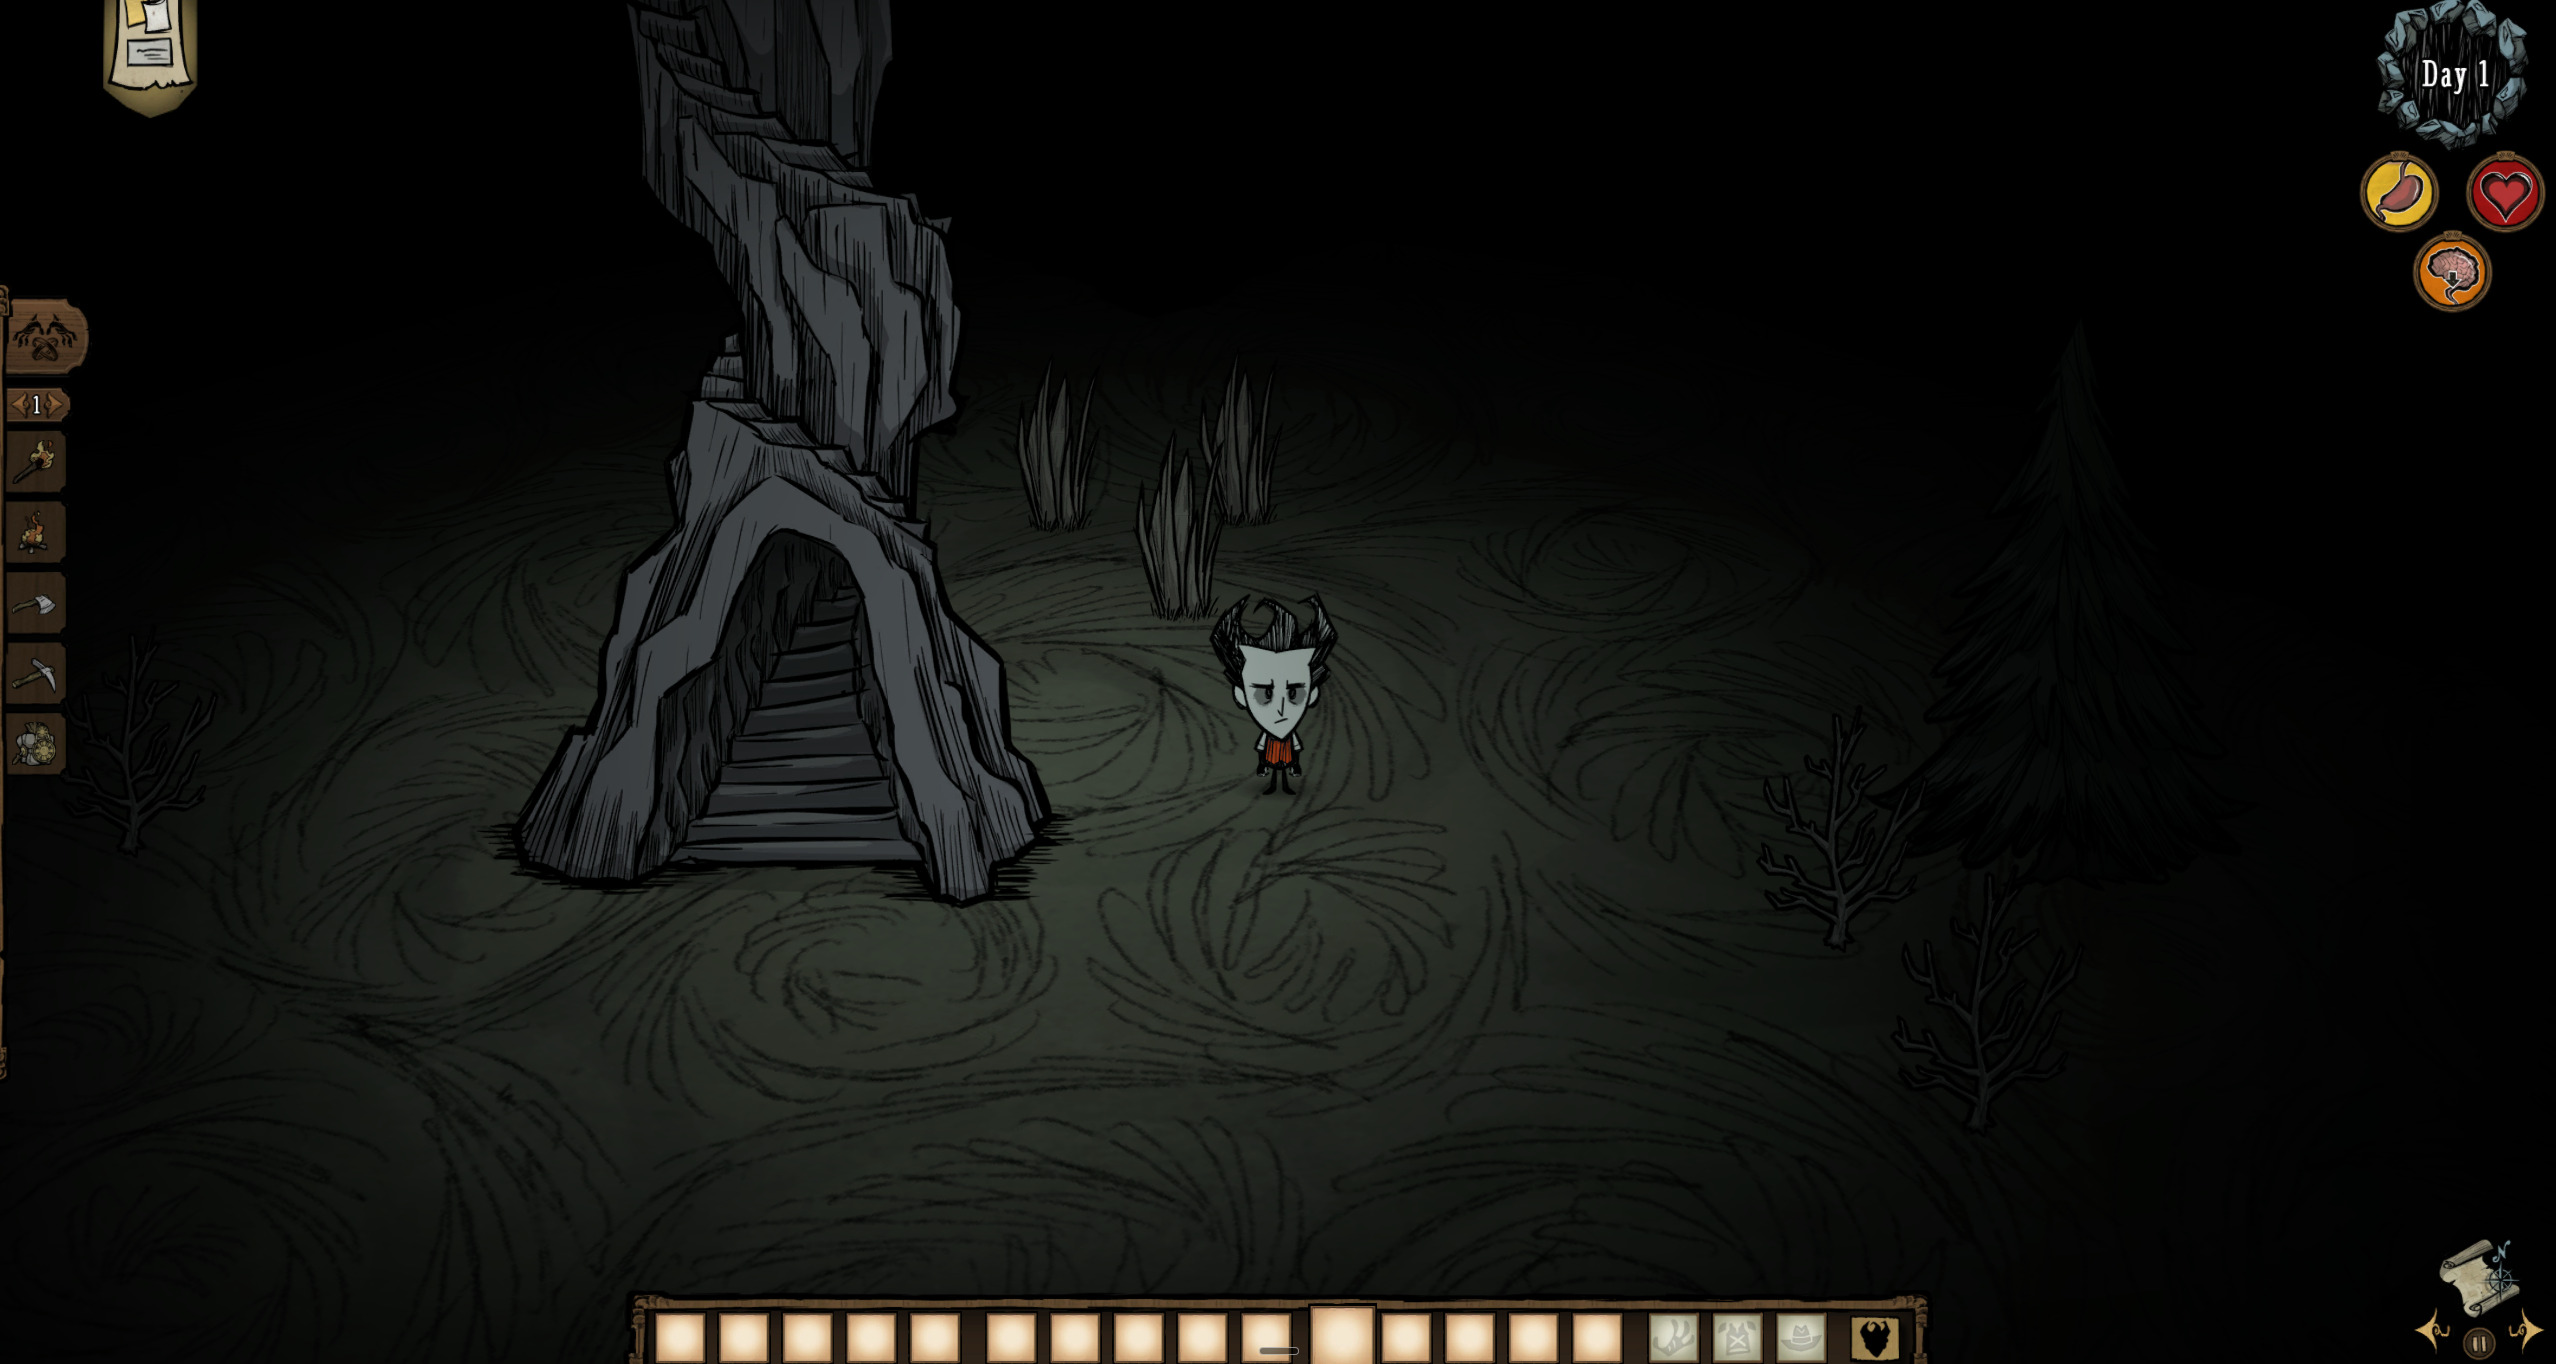
Explore the Caves with Friends
With the shard linked and the caves world generated, the sinkholes on your main server now lead underground. Your group can head underground for depths worm attacks, sudden earthquakes, and terrain that doesn’t exist on the surface. Your main server’s original world stays exactly where you left it, so nobody loses the base your group already built.
Gather your friends, bring light sources for the darkness below, and drop into the nearest sinkhole.
Getting Started and Joining Your Server
What You Need Before You Start
Get Your Cluster Token From Klei
Enter the Shard Settings on Both Servers
Start Each Server Once
Add the Shard Block to server.ini
Create worldgenoverride.lua on the Caves Server
Reset the Caves World
Check That the Caves Are Connected
Explore the Caves with Friends
Getting Started and Joining Your Server