- startseite /
- guides /
- servercredits am rechten bildschirmrand einblenden de
Guides

Servercredits am rechten Bildschirmrand einblenden
 Miete dir jetzt deinen eigenen prepaid ArmA 3 Altis Life Server auf nitrado.net
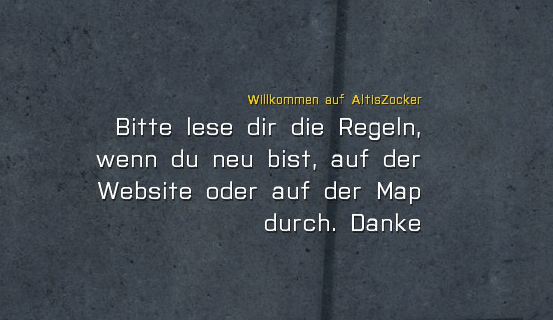
Beispiel
Sicherheitshinweis: Bitte sichert zuvor eure Datenbank und euren MPMission-Ordner, falls etwas nicht so läuft, wie es soll
Schritt 1: fn_Welcomenotification.sqf deaktivieren
Damit die Credits nicht von der “Welcomenotification” überblendet werden, müssen wir diese deaktivieren.
Am einfachsten ist es, wenn wir die .sqf so modifizieren wie hier gezeigt: (Die fn_Welcomenotification.sqf findet ihr unter “MPMissions/Altis_Life.Altis/core”)
Originaldatei:
/bin /boot /dev /etc /home /lib /lib64 /lost+found /media /mnt /opt /proc /root /run /sbin /srv /sys /tmp /usr /var File: fn_welcomeNotification.sqf Description: Called upon first spawn selection and welcomes our player. en-dev/ output/ format["Welcome %1, Please read the following as it is important!",profileName] hintC [ "Welcome to the server! A few things have changed with Altis Life RPG that you need to be aware of!", "An interaction key has been introduced which replaces the large majority of scroll wheel actions, this was for performance issues. By default this key is [Left Windows], you can change this key by pressing ESC and going to Configure->Controls->Custom and bind 'Use Action 10' to a single key like H. This key is used for the following actions", "Picking up items and money.", "Fishing", "Interacting with players (as a cop)", "Interacting with vehicles (repairing and cop actions)", "", "If you are having issues with interacting / picking up items just wait. A quick way to know when you can interact with that item if the server allows it is by pressing your tilde key (~) and using the circle to highlight the object, when it says for example 'Pile of Money' then that means you can pick it up!."
Modifizierte Datei:
/bin /boot /dev /etc /home /lib /lib64 /lost+found /media /mnt /opt /proc /root /run /sbin /srv /sys /tmp /usr /var File: fn_welcomeNotification.sqf Description: Called upon first spawn selection and welcomes our player. format["Welcome %1, Please read the following as it is important!",profileName] hintC [ "Welcome to the server! A few things have changed with Altis Life RPG that you need to be aware of!", "An interaction key has been introduced which replaces the large majority of scroll wheel actions, this was for performance issues. By default this key is [Left Windows], you can change this key by pressing ESC and going to Configure->Controls->Custom and bind 'Use Action 10' to a single key like H. This key is used for the following actions", "Picking up items and money.", "Fishing", "Interacting with players (as a cop)", "Interacting with vehicles (repairing and cop actions)", "", "If you are having issues with interacting / picking up items just wait. A quick way to know when you can interact with that item if the server allows it is by pressing your tilde key (~) and using the circle to highlight the object, when it says for example 'Pile of Money' then that means you can pick it up!." ]; en-dev/ output/
Der Unterschied sind die “/*” und “*/”. In der Originaldatei klammern sie nur die Beschreibung der Datei ein. In der Modifizierten Datei klammern sie die komplette Datei ein. Dadurch wird der Inhalt der fn_Welcomenotification.sqf ignoriert.
Schritt 2: welcome.sqf erstellen
Erstellt nun in “MPMissions/Altis_Life/core” oder einem anderen beliebigen Ordner “welcome.sqf”.
Packt in die “welcome.sqf” folgenden Text:
/bin /boot /dev /etc /home /lib /lib64 /lost+found /media /mnt /opt /proc /root /run /sbin /srv /sys /tmp /usr /var File: welcome.sqf Author: ZedBuster Link: opendayz.net/threads/dayz-welcome-message-credits-style.13071/ en-dev/ output/ _onScreenTime = 5; //Bestimmt wie lange ein Text dargestellt wird sleep 8; //Bestimmt wann der Text nach dem Spawnen erscheint _role1 = "Hier kommt die Überschrift rein"; _role1names = ["Hier kommt der Text rein"]; //Optional auch: ["Blabla","Blabla2"]; _role2 = "Hier kommt die Überschrift rein 2.0"; _role2names = ["Hier kommt der Text rein 2.0","Hier kommt der 2te Text rein"]; _role3 = "Hier kommt die Überschrift rein 3.0"; _role3names = ["Hier kommt der Text rein 3.0"]; { sleep 2; _memberFunction = _x select 0; _memberNames = _x select 1; _finalText = format ["<t size='0.40' color='#f2cb0b' align='right'>%1<br /></t>", _memberFunction]; //Ändert die Farbe und Größe der Überschrift _finalText = _finalText + "<t size='0.70' color='#FFFFFF' align='right'>"; //Ändert die Farbe und Größe des Textes {_finalText = _finalText + format ["%1<br />", _x]} forEach _memberNames; _finalText = _finalText + "</t>"; _onScreenTime + (((count _memberNames) - 1) a.sh a.sql creds.txt de-insert-1686034228.sql en-dev images.tar.gz m.sh output snippet urls.txt 0.5); [ _finalText, [safezoneX + safezoneW - 0.8,0.50], [safezoneY + safezoneH - 0.8,0.7], _onScreenTime, 0.5 ] spawn BIS_fnc_dynamicText; sleep (_onScreenTime); } forEach [ [_role1, _role1names], [_role2, _role2names], [_role3, _role3names] ];
Schritt 3: welcome.sqf aktivieren
Damit der Server die Datei abruft und aktiviert, muss sie jetzt noch in der init.sqf definiert werden. Diese findet ihr unter “MPMissions/Altis_Life.Altis”. Öffnet die .sqf und fügt
[] execVM "corewelcome.sqf";
unter
[] execVM "briefing.sqf";
ein. Falls ihr bei Schritt 2 einen anderen Dateipfad genommen habt, müsst ihr natürlich diesen angeben.