Guides

Valheim Player Control: Adminlist, Whitelist, and Banlist
Every Valheim server needs a way to keep the right players in and the wrong ones out. A trusted friend gets admin rights, a newcomer waits on your whitelist, and a griefer lands on the banlist for good. In this Nitrado guide, we’ll show you how to manage the adminlist, whitelist, and banlist from Player Control, plus how to edit them directly in Config Files.
Player Access and Permissions
Three lists determine who can access and manage your Valheim server: the Adminlist, the Whitelist, and the Banlist. You can manage all three from the Player Control page in the Nitrado web interface, or edit them directly as text files in the Config Files section.
The Adminlist gives players access to admin commands, such as banning or kicking players during a session. The Whitelist, also called the Permitted list, limits server access to specific players once it contains any entries. The Banlist prevents specific players from connecting to the server.
Platform Identifier and Player ID
Every entry in Player Control needs a platform identifier plus the player’s ID, not just a name. The format is [Platform]_[Player ID], case sensitive. An example for a Steam player’s entry looks like V_12345678987654321.
| Prefix | Platform |
|---|---|
| V_ | Steam |
| X_ | Xbox |
| S_ | PlayStation |
| N_ | Nintendo |
| A_ | GameCenter |
For a Steam player’s ID, find their Steam ID from their Steam profile:
- Open Steam and click the player’s name to open their profile page.
- Copy the 17-digit number from the profile link.
For any platform, you can also read the ID straight from your server:
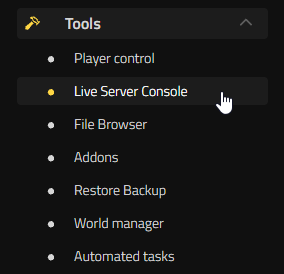
- Navigate to Tools > Live Server Console and have the player connect to your server.
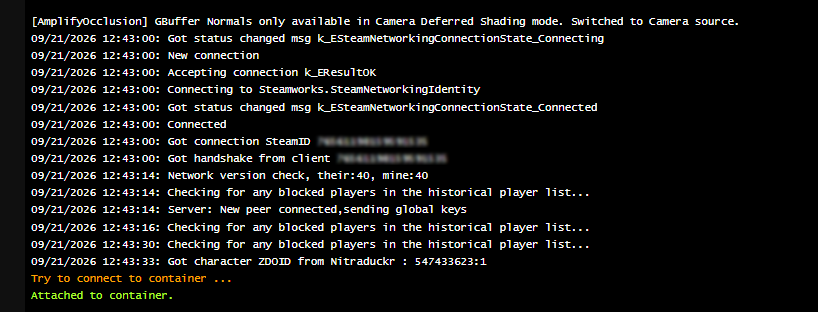
- Look through the console output for a line containing “Got connection.” This line usually shows the player’s platform and their player ID.
On PC, pressing F2 in-game also shows the connected player’s platform identifier and ID, though the Live Server Console is easier since you can copy the ID directly from the log.
Managing Your Lists in Player Control
The Player Control page shows everyone currently connected, as well as players already added to a list. Search options help you find a specific player quickly. Adding a player to any list follows the same process:
- Navigate to Tools > Player control.
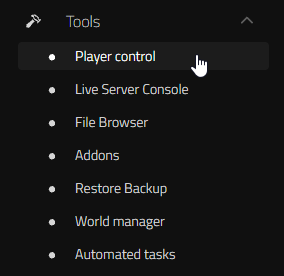
- Click Add player in the top right of the page.
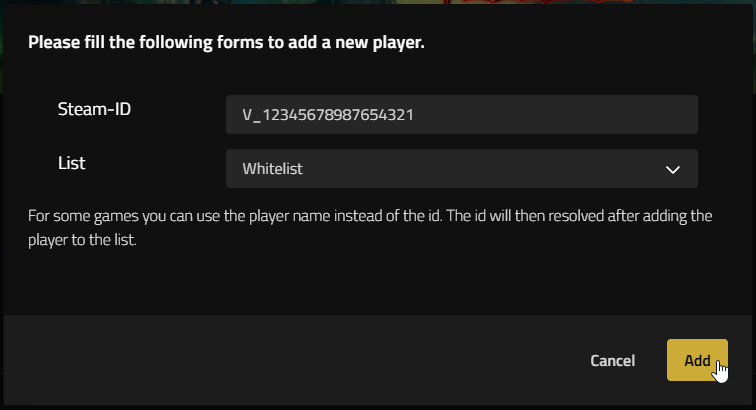
- Enter the player’s platform identifier and player ID into the Steam-ID field (even though it says Steam-ID, all platform IDs go in here).

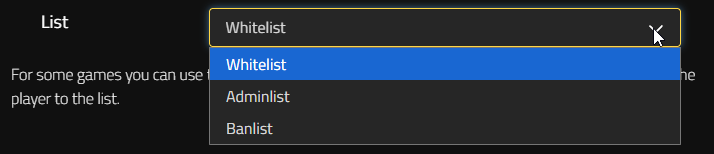
- Select the target list from the List dropdown: Adminlist, Whitelist, or Banlist.
- Confirm with Add and you’re done!
If a newly added player doesn’t appear in the table, clear the Online checkbox. It filters the table to connected players only, so a player you just added while they’re offline still needs it cleared to show up.
Editing Player Lists Directly (Config Files)
Do you prefer working in the files, or pasting in a long list at once? You can edit the player list files manually in the Config Files section.
- Open your server’s web interface and stop your server.
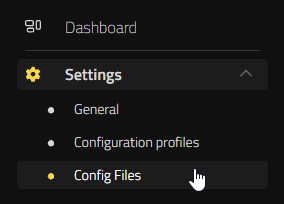
- Navigate to Settings > Config Files.
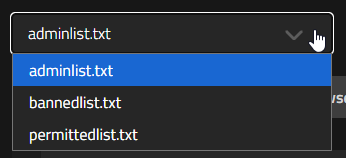
- Open the list file you need: adminlist.txt, bannedlist.txt, or permittedlist.txt.
- Add each player’s platform identifier and ID on its own line.
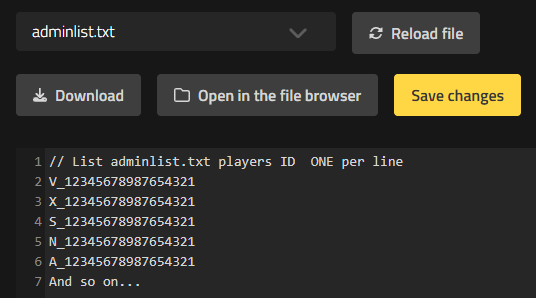
- Save Changes, then restart the server.
Each file maps to one list: adminlist.txt for admin rights, permittedlist.txt for the whitelist, and bannedlist.txt for bans.
Adminlist
Add a player to the Adminlist to give them access to the server’s admin commands, including bans and kicks. Select Adminlist from the List dropdown when you add them in Player Control.
Whitelist
The Whitelist, also called the Permitted list, restricts your server to players you’ve explicitly approved. Once it has any entries, only players on it can join, so add everyone you want to keep before you add anyone at all, or you’ll lock out the rest of your community. Select Whitelist from the List dropdown when you add a player in Player Control.
Banlist
The Banlist blocks a specific player from connecting to your server. Select Banlist from the List dropdown when you add them in Player Control.
Removing a Player
Removing a player works the same way across all three lists.
- Open Tools > Player control and find the player’s row in the table. Use Search for players or the Search in all lists option if you don’t see them right away.
- Clear the Online checkbox if the player isn’t currently connected.
- In the Lists column, check which lists the player is currently part of. Click the list you want to remove them from.
You can also remove players directly from the list files using the same process described for editing player lists directly in the Config Files.
- Open your server’s web interface and stop your server.
- Navigate to Settings > Config Files.
- Open the list file you want to edit: adminlist.txt, bannedlist.txt, or permittedlist.txt.
- Find the player’s platform identifier and ID, then remove the entire line.
- Select Save Changes, then restart the server.
The player is removed from the corresponding list once the server restarts.
You’re Ready to Manage Your Server
With your Adminlist, Whitelist, and Banlist configured, Player Control is watching the door for you. Add your trusted players now, and they’ll be ready to join when your server opens. For the commands your admins can run once they’re on the adminlist, see our Valheim console commands guide.
Player Access and Permissions
Platform Identifier and Player ID
Managing Your Lists in Player Control
- Editing Player Lists Directly (Config Files)
- Removing a Player
You’re Ready to Manage Your Server