Guides

Uploading a Map to 7 Days to Die

Upload map from a Local save
Uploading a Pregen map
To upload your already created 7 Days to Die map to your server you first have to locate it in your “Saves” folder.
Upload a map from your PC
- Open a browser window and type ” %Appdata% ” and hit enter.
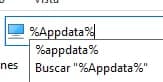
- You will be redirected to the folder AppdataRoaming
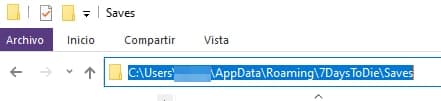
- Go to the address AppdataRoaming7DaystoDieSaves
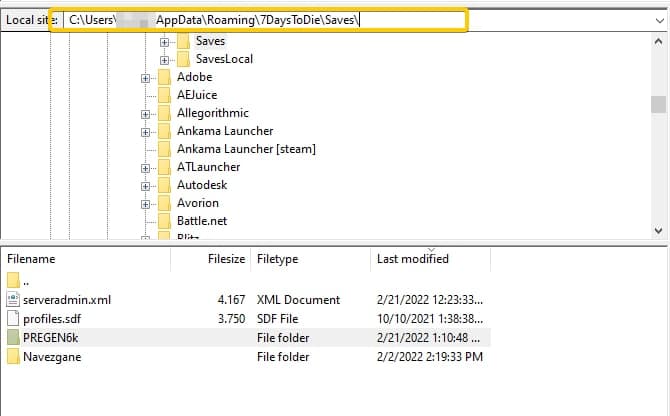
- In this folder you will find your different types of maps. In our example our map is located in the folder PREGEN6K and the name of the map is “Uploadmap”
- Without closing our current window. Now we will have to connect to our server by FTP .
- Remember to stop your server before connecting.
If you don't know how to connect via FTP please go to the following link: https://wiki.nitrado.net/en/3.How_to_use_your_server%27s_FTP
- Once connected to our server we are going to go to our Saves folder and copy the address.
- On the left side of Filezilla (or our FTP connection program) we paste the address we just copied.
- On the right side (our server) we go to ” 7daystodie/saves “
- Here we will upload the folder containing your map and replace the existing files.

- Once the files have been uploaded we can close Filezilla.
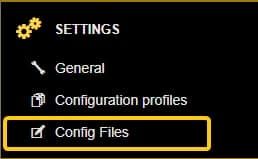
- Now we will go to the Web Interface of our server to the section of ” Settings/Config Files “
- Once there, we will look for the values GameName and GameWorld .
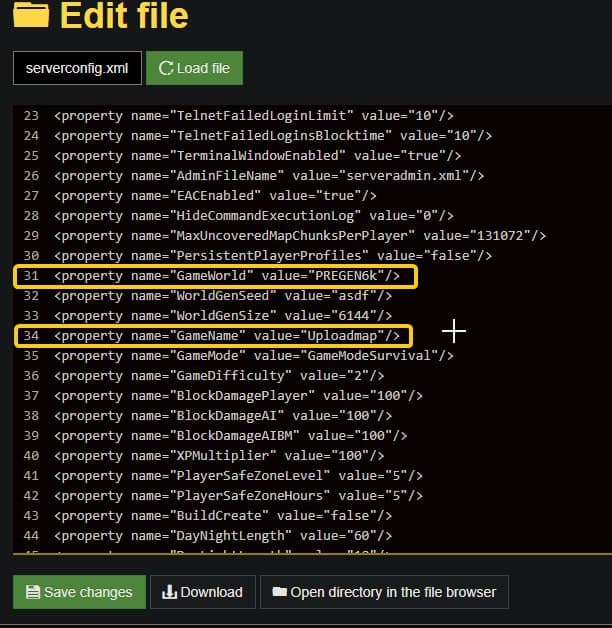
- Change GameName for your map’s name (in our case Uploadmap )
- Change GameWorld for the type of map, in our case, PREGEN6k .
It is important to match upper and lower case letters if your name has any.
- Save your changes and go to your general settings. Game Name and Game World should now match the changes you have made.
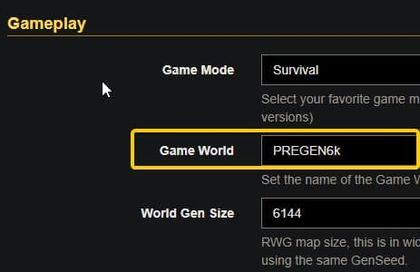
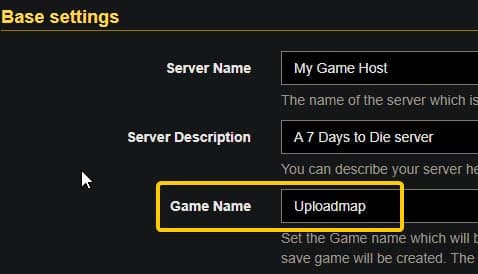
If the Game World does not match, switch to the map type you have.
- Save the changes.
- And it’s done! You have successfully uploaded now just start your server and enjoy!
Uploading a Random generated map
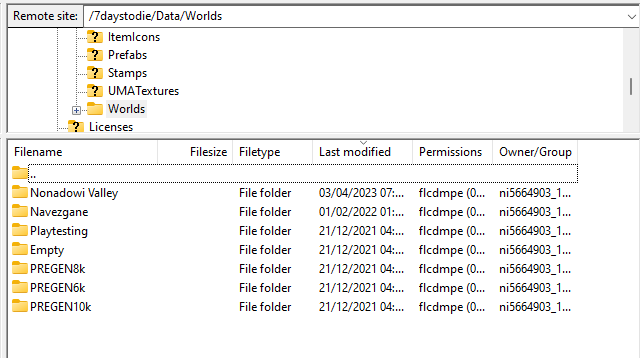
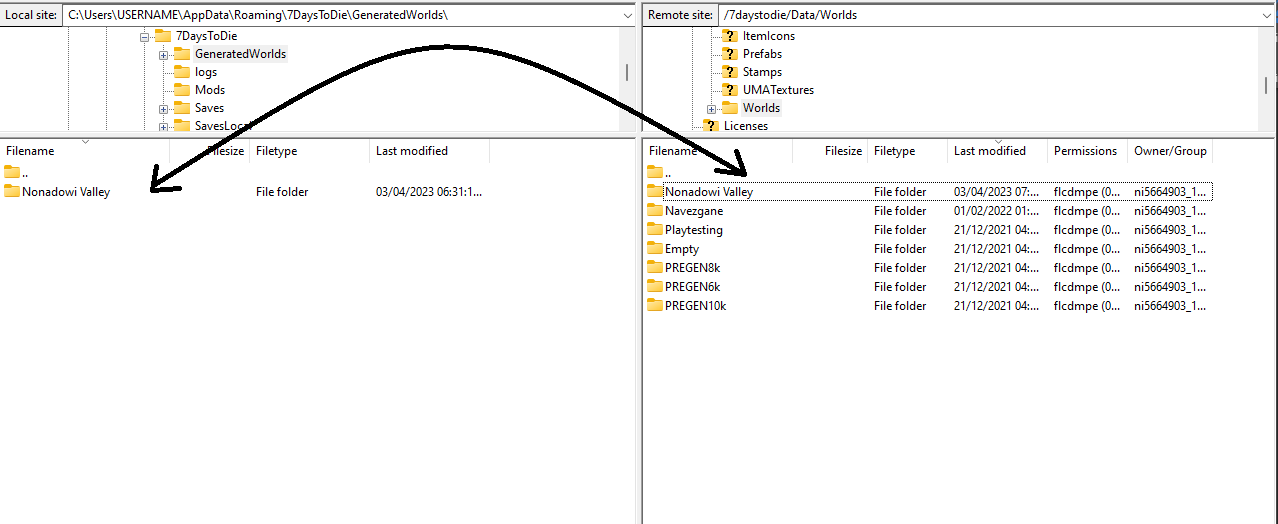
- Go to your web interface and stop your server. Connect to your server’s FTP, we recommend Filezilla. Inside Filezilla, on the Remote site go to the following directory:
/7daystodie/Data/Worlds
- On your local site go to the following directory:
C:UsersUSERNAMEAppDataRoaming7DaysToDieGeneratedWorlds
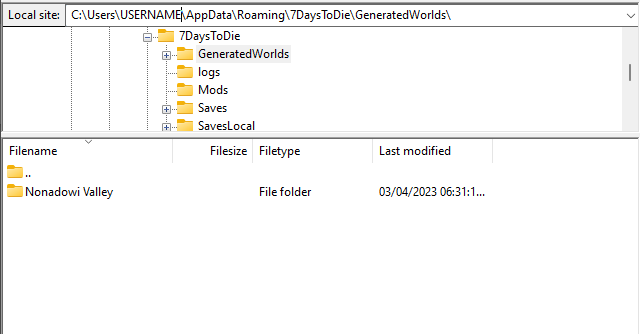
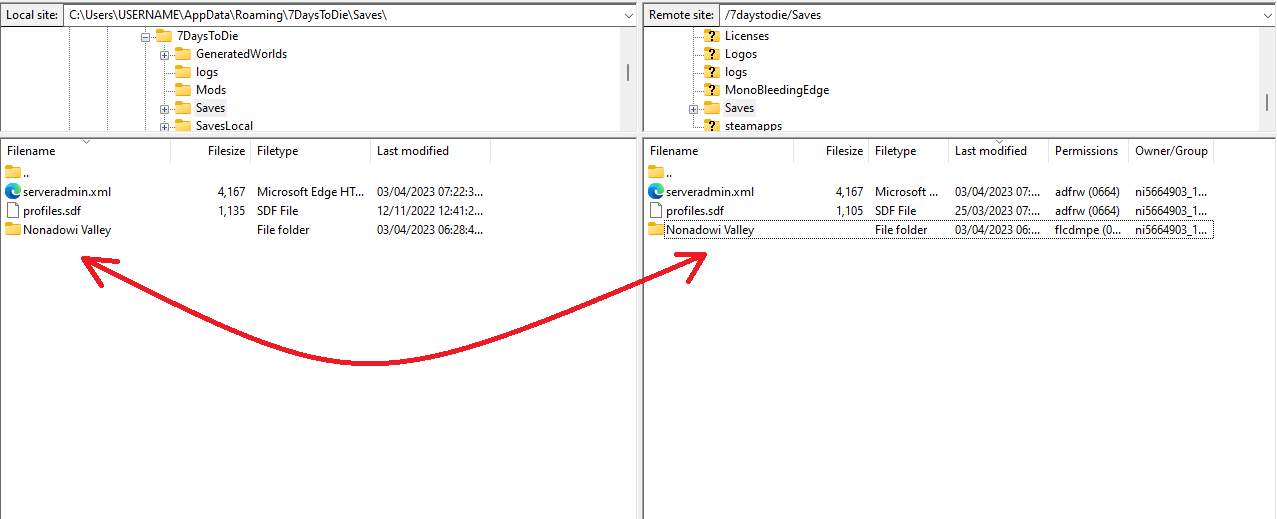
- Locate the name of your map and drag it from the local site (Your PC) to the remote side (your server). In this case is “Nonadowi Valley”
Uploading your savegame
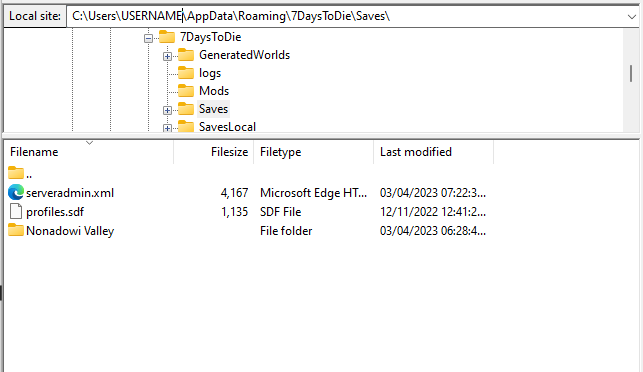
- Now inside Filezilla on the local site go to the following directory:
C:UsersUSERNAMEAppDataRoaming7DaysToDieSaves
- On the remote site go to the following directory:
/7daystodie/Saves
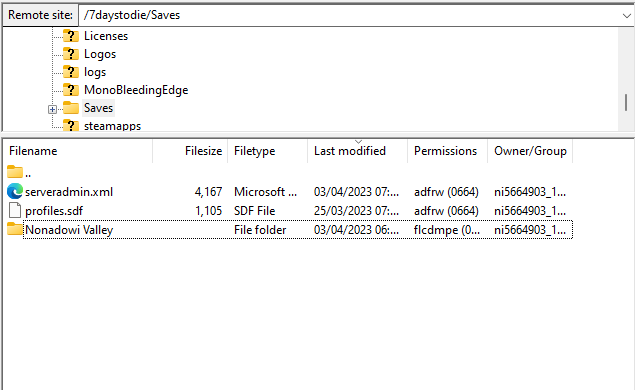
- Locate the name of your savegame folder and drag the entire folder from the local site (Your PC) to the remote side (your server). In this case is “Nonadowi Valley” (It has the same name as the map)
- You can close Filezilla.
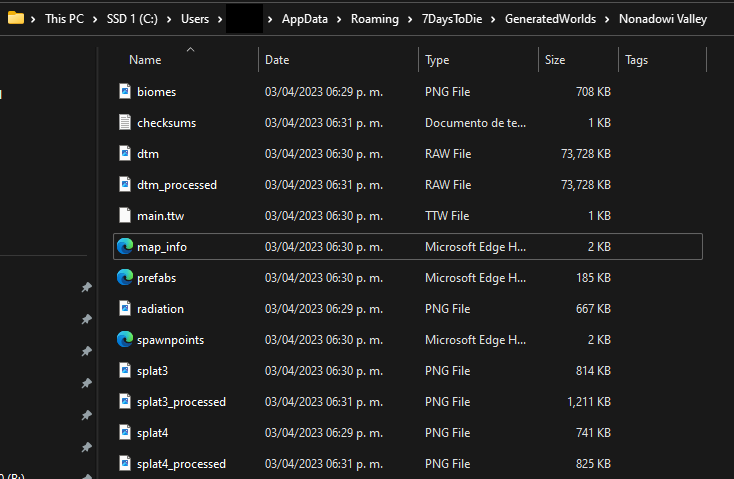
- On your PC go to the following directory:
C:UsersUSERNAMEAppDataRoaming7DaysToDieGeneratedWorlds - Then open your world folder.
- Open the file map_info.xml with your preferred text editor.
- Locate Generation.Seed and HeightMapSize (Your HeightMapSize field may show two numbers separated by a comma, you only need to copy one of the numbers, not both) and write down these values.
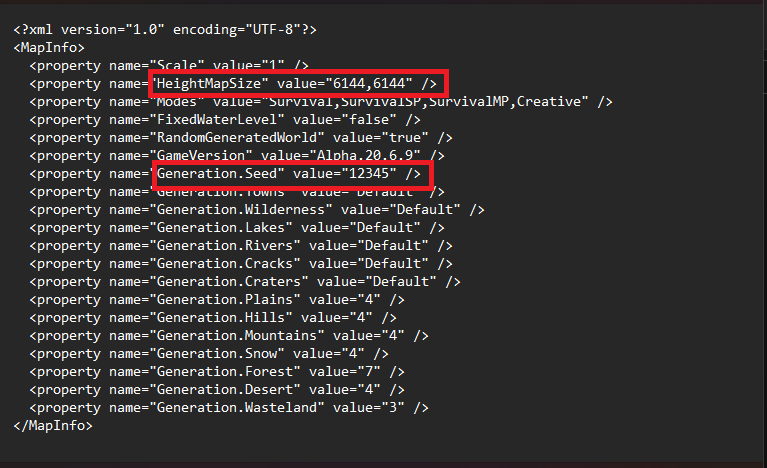
- In this case:
- 6144 (HeighMapSize)
- 12345 (Generation.Seed)
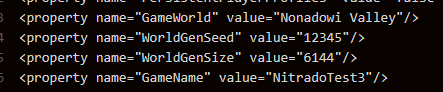
- Go to your web interface > Config Files > Serverconfig.xml and look for the following lines:
- GameWorld
- WorldGenSeed
- WorldGenSize
- GameName
- In GameWorld, type the same name as the world folder that was uploaded to the server.
- For this example, “Nonadowi Valley”
- In WorldGenSeed enter the value of Generation.Seed
- For this example, “12345”
- In WorldGenSize set the value of HeightMapSize
- For this example, “6144”
- In GameName enter the name of the savegame.
- For this example, “NitradoTest3”
- To know the name of your savegame go to the following directory on your PC:
C:UsersUSERNAMEAppDataRoaming7DaysToDieSavesNAMEOFYOURWORLD
Once you have finished putting the correct values in the serverconfig.xml it should look like this.
Save changes and restart your server.
Transfer Map from One Server to Another
Please note that if you wish to make this transfer from an Experimental version to a Base game, it will only be possible when both versions are the same.
To transfer your already created 7 Days to Die map to your server you first have to locate it in your “Saves” folder on your server.
- Remember to stop your server before connecting.
If you don't know how to connect via FTP please go to the following link: https://wiki.nitrado.net/en/3.How_to_use_your_server%27s_FTP
- Connect to your server via FTP
- Go to the address 7DaystoDieSaves or SevendaysexperimentalSaves
- In this folder you will find your different types of maps. In our example our map is located in the folder PREGEN6K and the name of the map is “Uploadmap”
- Download a copy of this folder to your computer.
- Now finish the connection to the current server and connect to the server where you want to upload your map.
- Once connected to the server. On the right side (our server) we go to ” 7daystodie/saves “
- Here we will upload the folder containing your map and replace the existing files.
- Once the files have been uploaded we can close Filezilla.
- Now we will go to the Web Interface of our server to the section of ” Settings/Config Files “
- Once there, we will look for the values GameName and GameWorld .
- Change GameName for the name of your map (in our case Uploadmap )
- Change GameWorld for the type of map, in our case PREGEN6k .
It is important to match upper and lower case letters if your name has any.
- Save your changes and go to your general settings. Game Name and Game World should now match the changes you have made.
If the Game World does not match, switch to the map type you have.
- Save the changes.
- And it’s done! You have successfully uploaded now just start your server and enjoy!
Upload map from a Local save
Uploading a Pregen map
Uploading a Random generated map
- Uploading your savegame

